I recently went to a "Last Quilters Standing" challenge at Rooster Creek Quilt Shop for their 5th Anniversary. I lasted 43 hours without sleep, but the winner of the $2000 plus prizes which included a Bernina machine lasted 59 hours! Even though I didn't win, I made some great friends, picked up some sewing tips and got a lot of projects completed!!!
The 1st project I worked on was the binding to my daughter's "Limitless" quilt she designed. All the little 2 1/2 inch colorful squares just added the perfect touch to her beautiful innovative quilt!!! The quilt is 98 x 98 inches so that's a lot of squares. It tremendously helps to roll the binding for assembly.
The next project I worked on was my "Llama Love You" quilt. And yes, by this time into the competition there was a little bit of "Llama Drama" going on! All of us quilters wanted to win the $2000+ prizes so bad!!!
I just love to add embellishments and glitter to my quilts to give them texture. I didn't get around to quilting the top until later, but quilted the top using my domestic machine.
The "Llama Love You" pattern includes both the top and the quilting design.
The last project I worked on was my "FredBird" baby quilt. My son was a pitcher in High School and College and we're from Missouri, so I had to capture FredBird pitching!!! I used fabric paints to make the top and my domestic machine to quilt it!!! Sorry, you can't really see the quilting in the picture. I think next time I will applique FredBird!!! I used to applique my FredBird quilts, but my machine broke so I started painting them. I while back I purchased a new (used) machine that I love so my next one will be appliqued!!!
So remember when we made these drawstring bags.... we're coming back with ways to personalize them!
With the canvas on the front you can use fabric markers, sharpies, or even puff paint to make your bag your own. I cannot describe how much the kids had decorating these. We go on an annual trip each year with extended family so each grandchild decorated one to take along.
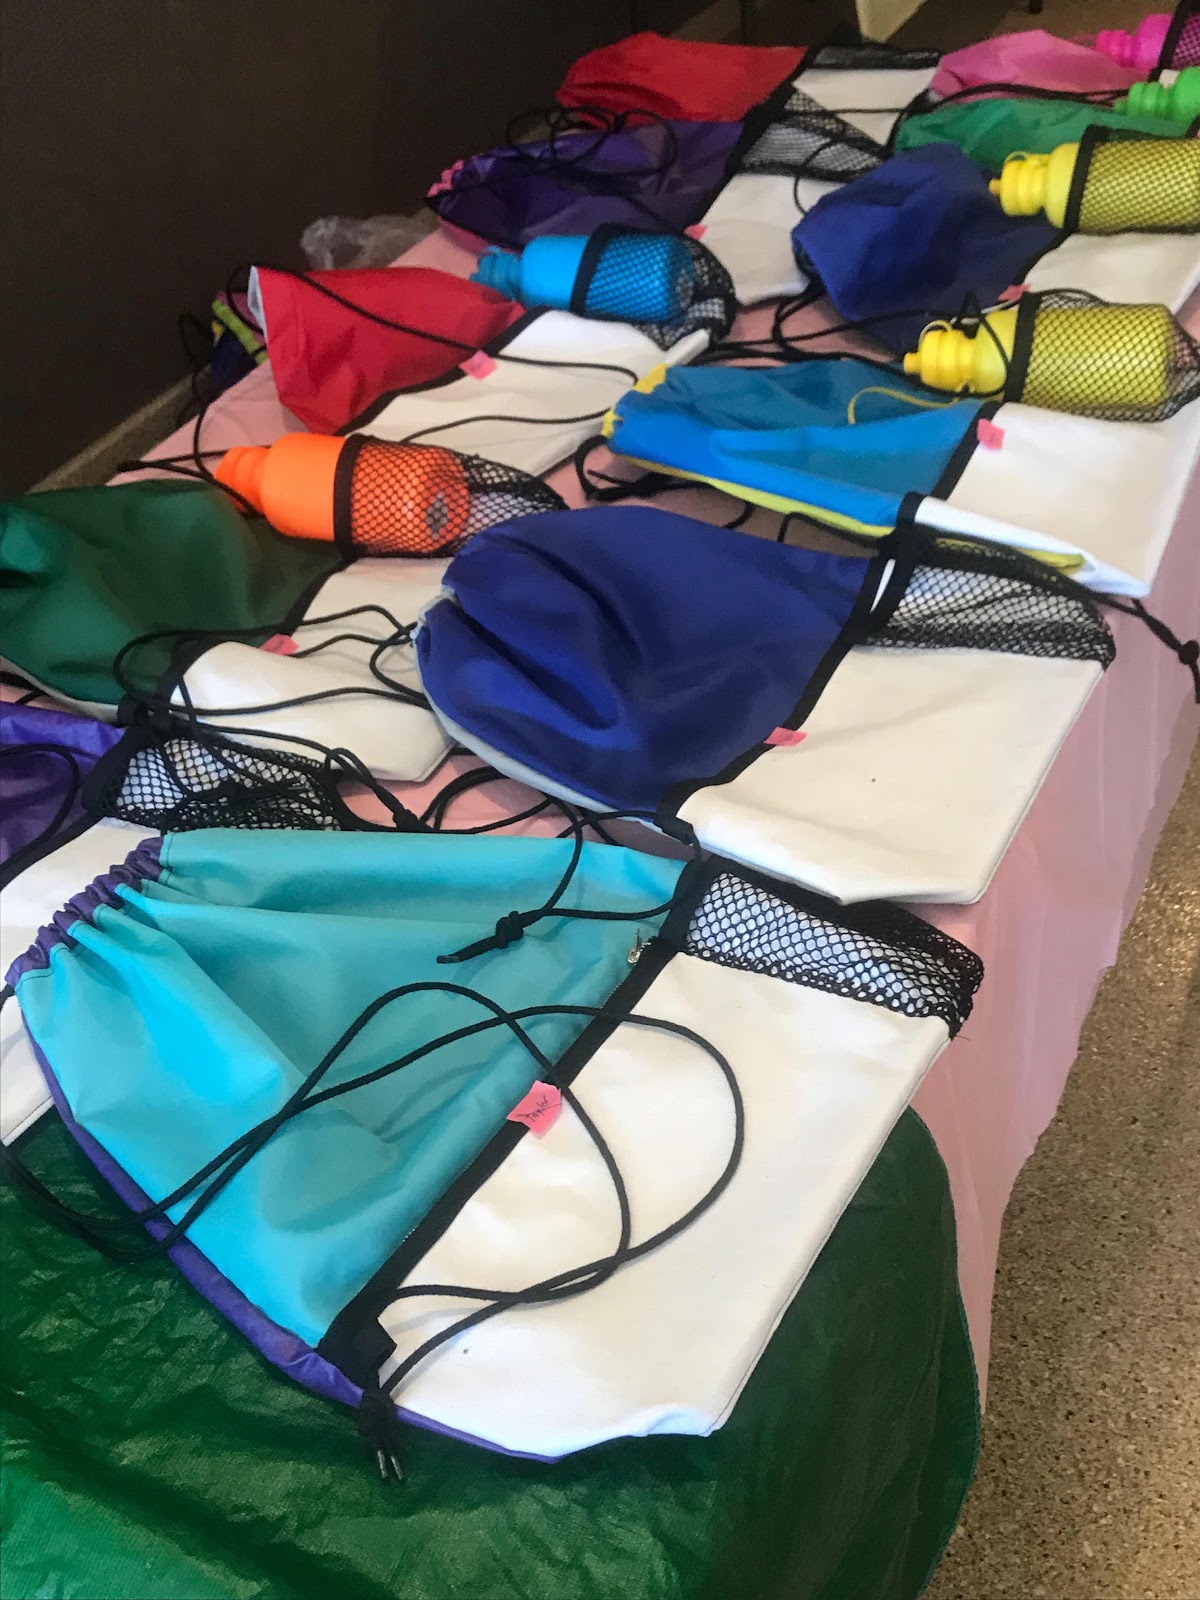
We even had a special family sewing day to whip these together. They come together quickly and are very easy to make! We had an 11 year old make an entire bag and even myself and my aunt who would be considered beginners mastered this pattern!
There are few things I love more than an inspired sewing project. Not sure how or why this idea struck me but when it did - watch out! For a beginner that doesn't or didn't know how to sew this sewing project seemed doable and not very daunting.
Remember especially if you are beginner what would be best to hone your skills! This is one of those great sewing projects. This idea started with my love of following recipes that were passed down in my family. We have a great collection that I refer to often but I wanted something more tangible.
My mom had used Spoonflower recently (see the llama print on back - yes minky picture of the front!!!) and had great results so I thought maybe I could as well. I scanned in recipes from mom, mother in law, grandmothers, dad, and friends and made a collage photo that I uploaded to Spoonflower.
The whole process was pretty easy and I really liked how the print was going to turn out! I did order a sample just to see quality and if the writing would be too tough to read - but it truly turned out perfect. I did order a couple yards which was more than plenty fabric for an apron but made great pot holders and oven mitts as well (#bonus!!)
I used more leftover coordinating wedding fabric for some sparkly (of course!) details on my apron! Can you ever have enough teal,blue, and purple - you can see from the Pattern That Changed My Life that I do not think so.
This pattern had heart details and I used some clipart to make some a "decal" of sorts for the front using the freezer paper transfer method.
Fun heart detailed stitching, an elastic neck band, gathered waist, and bold colors make an apron that is so full of love it is about to burst!!
Every year my grandma bakes cookies for a giant cookie bake we have around Christmas! With over 13 kids and ?? grandkids and great grandkids (lost count!) there is so much time spent together.
I revealed my apron and was proud to show grandma. I'm pretty sure she liked it - even more when it got messy and "did its job." The love of baking and cooking is strong in our family but merged with the love of sewing in a way to capture tradition is pretty priceless.
Do you need a great kid's drawstring bag? or a great kid's backpack perfect for a swim bag or sports bag? Look no further!
These drawstrings bags are SEW EASY! Perfect for a beginner and just in time for Easter!
I wanted to make a drawstring bag/backpack that could be used by kids, teens and adults for almost any purpose (beach, pool, sports, toys, overnight, etc.) My must haves were a place for a water bottle, an outside pocket for quick access to incidentals, quick drying and a place that could be personalize. I also wanted the bag to be so easy to sew that BEGINNERS could make it!!!
I think I've accomplished what I set out to do! The kid's drawstring bag took me several tries to perfect the pattern, but I really think anyone could follow the easy step-by-step instructions with detailed step-by-step pictures. This drawstring backpack can be made in under 2 hours! The pattern includes two sizes.
More pictures to come later after these have been gifted for Easter and the kids have had a chance to personalize them!!! I can't wait to see what they come up with!!! I was thinking about gifting them with washable markers so they can draw on the canvas and re-draw again and again after being washed or a more permanent solution with fabric paints/pens!
I could start with the most common advice which would probably be found in "Sewing For Beginners" book somewhere - start small.
OR
You can dream a little bigger because you probably want to start sewing and don't want a "baby" project to be your first project as a new to sewing creator!
Are you like me and avoid buttons and buttonholes at all costs? Well not any more!!! I've conquered my fear and you can too - learn how to sew a button!!!
My daughter and I have just started making these Cushy Career pillows with the Doctor/Veterinarian pillow being the 1st. You can find the pattern for the Cushy Career Doctor Pillow in our Etsy Store Note to self: Don't let grandkid play with my sewing scissors any more - he cut a hole in his sock!!!
If I'm going to donate the item (which I do often), I don't label. If I'm going to give the item as a gift, I always label it. (Well almost always - see note at bottom!)
I label items for remembrance sake. It started with quilts that I was making as keepsakes and has just spread from there. I use to buy labels and write my name & date on them with a fabric pen which was kind of boring and my hand writing is awful!. I went from that to buying labels with my name printed on them and stated "Made with Love". This was okay, but still not very personal and not the look I was going for. Besides, the labels were expensive and I couldn't find exactly what I wanted.
My daughter started making quilts and when she made her very 1st quilt she showed me a video from the internet about labeling a quilt and said do you think we could do this? Imagine that, a beginner with internet experience showing me a new - better way of doing something. I was amazed and impressed, but then she always impresses me! I told her sure we could do that and ever since then, I've been labeling my quilts this way and other projects as well!!!
The process is really pretty simple. There are lots of video's out there showing you the process. This is just one of them How to Make a Quilt Label.
Being the perfectionist that I am and not liking my hand writing, I decided to embroidery my labels. I embroidery them before I attach them. I usually put a decorative stitch across the top, put my name, year the item was made and I also put my signature white dove with the olive branch.
The dove has a special meaning for me and has become my trademark. My family knows if there is a dove on something they get that it came from me and was made with LOVE! I hope that each time they see the dove, they think of me and know how special they are to me!
The story behind the dove:
My father-in-law had cancer and was sick for quite some time. Hospice told us he only had a couple of days to live so we didn't want to leave his side. My daughter was getting Confirmed so we left for Confirmation and returned immediately after the ceremony. He passed the next day. For those of you who are Catholic, you know that the dove is the sign of the Holy Spirit and the olive branch has to do with Noah's ark and a sign of land. A couple of weeks after his passing, my daughter and I was driving to Sunday mass and we saw a white dove hovering in the air with a small branch in its mouth. It was just hovering in thin air. She looked and me and I looked at her and we both said did you see that. Still gives me goose bumps to this day. It was my father-in-laws way of telling us he was okay!!! It's something I will never forget. I feel like he is looking over us and protecting us and I smile each time I make something and add the dove to the label.
I'd love to hear if you label your items and if so, I'd love to see some pics of your labels!!!
Note: The label has sparkly material - of course this quilt was a gift to my sparkly rainbow daughter who introduced me to making my own labels!!! (Mom- I teared up earlier and now laughed out loud at that last sentence)
Note: If I'm making items in bulk to give to grandkids and relatives like this swim bag or Cushy Career Doctor Pillow - I don't typically add a label.
Perfect and just in time for Easter!! Check out how to make a DIY Mesh Bag for a little one (or big one!) in your life!!
These make great swim bags!!! I like
using nylon material because it's strong, great for fabric
painting/embroidery and great if you want to use the bag as a swim bag (dries
in no time)!!! If you are
going to be using the bag for little toys like Lego’s, you might want to line
the inside of the bag with nylon or some other material. The below tutorial does not include a lining. To do that, just buy and cut a piece of material 18” x 42” for column and sew together and 11” circle for bottom and sew column to bottom and top before adding drawstring step. It’s that easy to alter!!! Possibilities are endless!!!
Wouldn’t your kid/grandkid love a gift in one of these bags or simply love the
bag as a gift itself!!!
I've also designed these bag options that include that all important cup holder and zippered pocket option if you prefer something different!!!
Let's walk through the first time this happened (circa July 2018 - hehe!) and remember I flew, FLEW through making this pattern that changed my life!
I'm generally the time of person that learns as I go and it works for me. I consume and seek out knowledge as I need it but for those planning a quilt or even veterans here are some tips to make your next quilt process smoother or (dare I say...more inspired!)
1. Begin with the end in mind!
Maybe you have a favorite Pin you saved, picture you saw, or mental image of your next work of quilting art, capture it in a way that you can piece it together. Meaning print it out, make it large scale if necessary so you can think through how you want to put it together. Having a pattern here may be helpful!
2. Is this skill new?
If yes, GOOD FOR YOU! Thinking outside your box, I've found only expands your potential and pushes you creatively! You might want to take a class, watch a video, or do some research. I've embedded my favorite paper piecing video EVER that takes the guess work out of it!
3. Prep the Scene!
Make a plan and get prep cutting finished. I love to listen to music or podcasts while cutting to make it go by faster. With improv quilts - I totally skip this and just work as I go. Each method has similar results and I listen to the time I have or what I am making.
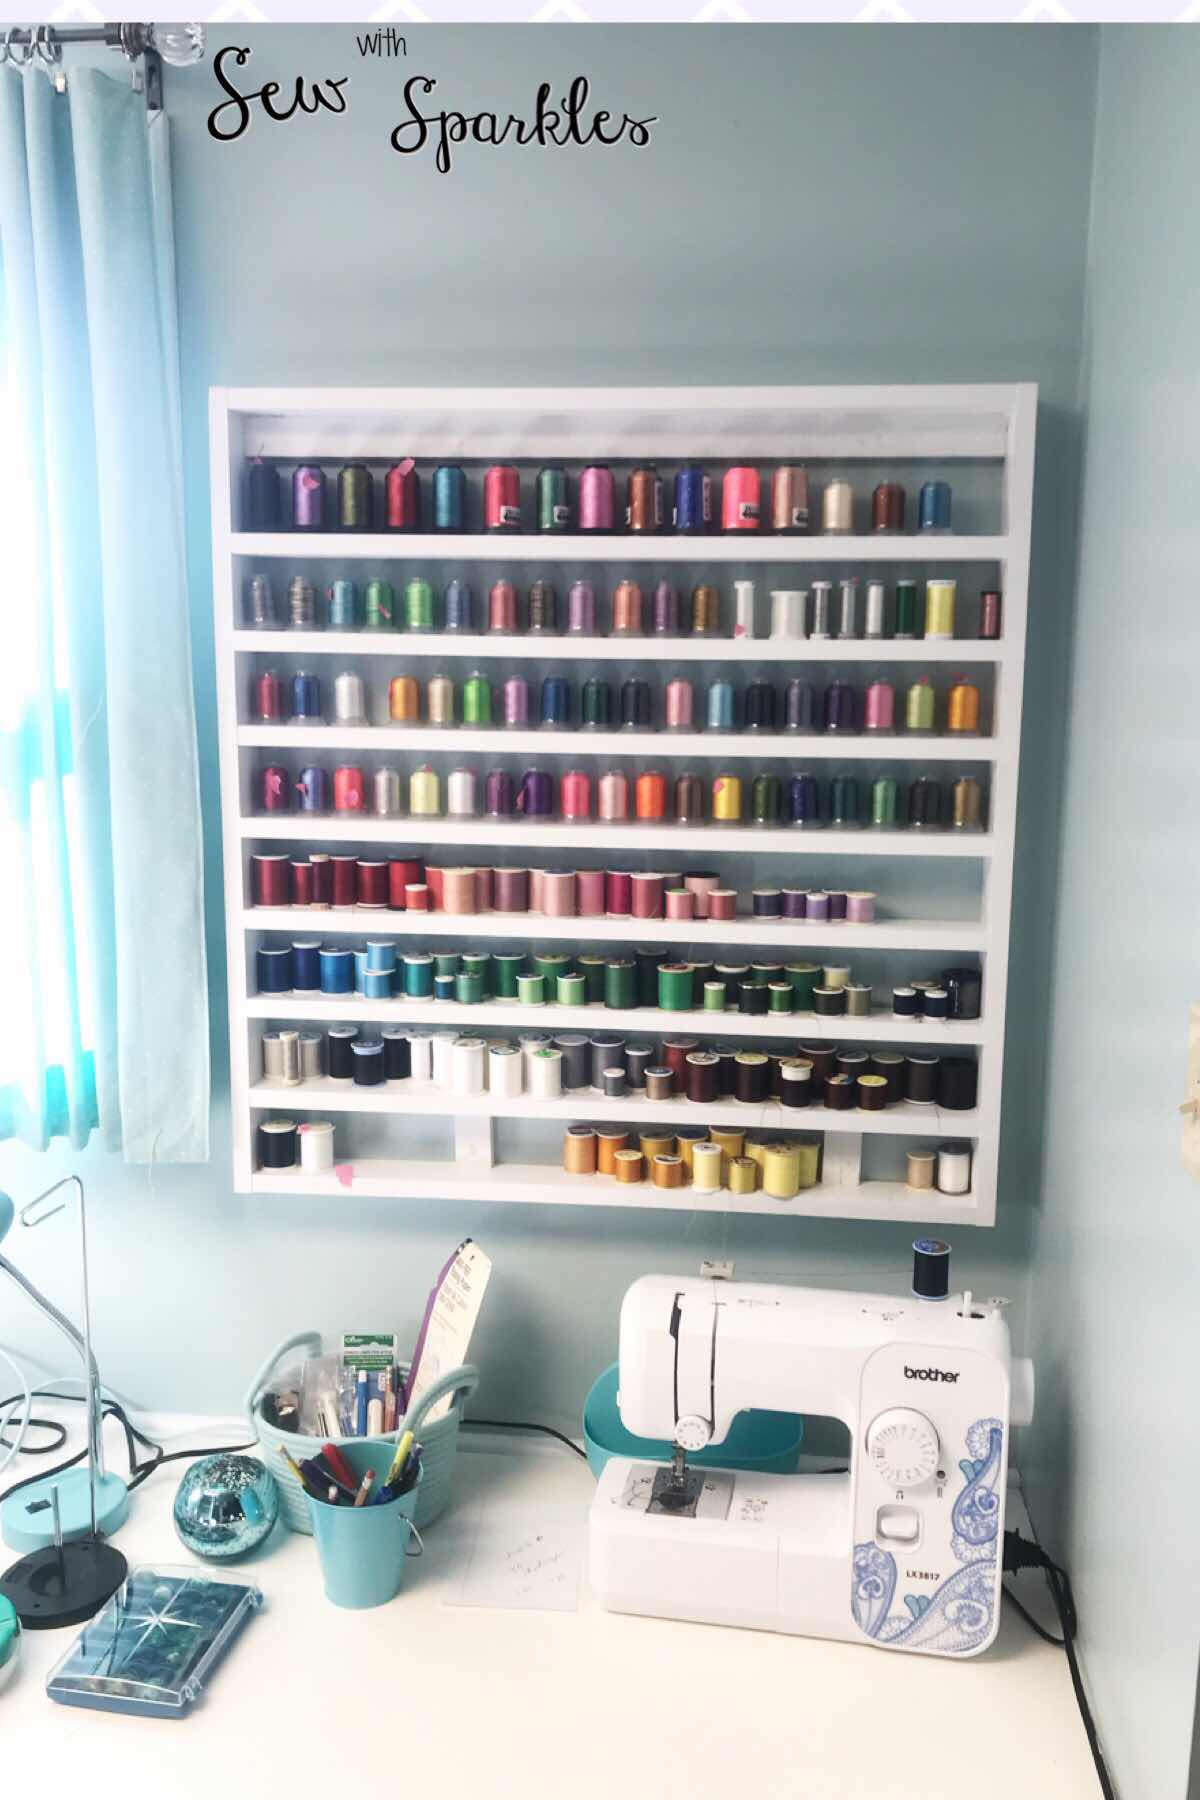
Note: this is Karen's sewing room! Amber's is a basement concrete area half covered in dust (no joke!) I love envisioning myself here and only actually sew there when I visit. We can't all have dedicated, organized sewing areas!
4. Double Check Supplies
Do you have enough thread? Do you have bobbins wound? Is your work space organized? What can you prepare to have the smoothest possible start to finish? Thinking ahead ALWAYS pays off when sewing!
If you want to make one of these Threadholders for yourself - check this out!!
5. Time Bound
What is your goal of completion? Will you need to break down the steps and set deadlines for yourself to complete? My quilts tend to not need completion by a certain time but I do keep myself working and momentum up in order to keep the ball rolling and moving forward.
You've got the beginning now check out the secret to happy quilts here!
Measure the space where you want to put your Thread Holder to determine your height and width. Don't worry about wall studs at this point because I have a solution for that later. I hate using toggle bolts!!!
Determine how much space you want in-between each row depending on the size of your thread. I made mine with a 3" space between rows, but you could do varying sizes depending on your needs. Do the math to figure out how many horizontal boards you are going to need. Example: If you want your height to be 36" and space between rows to be 3", then divide 36 x 4 (3" space and 1" for board) = 9. Therefore, you will need 9 boards for the 9 shelves and 1 board for the top. Because of the 1" board on the top, the top row will only have a 2" space unless you bump the height up to 37". You might need to play with measurements to get what you want. The math is the hardest part of this project!!!
Cut your vertical boards out of 1x3's. We used a miter saw, but you can use what you have. The most important thing is to make sure they are all exactly the same length and that they are square. Tried doing this with a skill saw 1st and that didn't work so well for us. Also cut 1 1x2 board the same length to be used later in step 9.
Cut 2 horizonal boards out of 1x3's the height you want the thread holder.
Start assembling. Drill 2 pilot holes for nails (so boards don't split and makes for easy nailing) in bottom of side board to attach side board to bottom row. You can skip this step if you are fortunate enough to have a nail gun and if you have a nail gun - you probably don't need these instructions because hubby will be able to make this no problem!!!
Nail side board to bottom row and attach the other side the same way. It does come in handy to have a couple of sets of hands!
wood spacers for even spacing!
Continue this process up to the top. To make is easy and keep our spacing consistent, I cut some 3" boards out of the 1x2 board to use as spacers. This kept everything nice and level without measuring between boards!
Nail last row board to side boards. It might not space out exactly, but who cares - just nail to top wherever you end up.
Place the 1x2 board under the top board so it will lay flat against the wall and nail it from the top and sides drilling holes 1st. This is your brace board and the board that you will put the 2" screws thru that will go into wall studs.
Use a stud finder to find the studs then mark the 1x2 board where you need to screw - that simple!!! If you don't have a Stud Finder , you should really get one, but if not, you can always nail across your wall until you find a stud and then go 16" from that and there should be another stud. Make sure you are nailing where brace board will cover nail holes. Also use a level to make sure you are level or if you don't have a level you can always measure down from ceiling and mark wall.
small board attached to top shelf for easy mounting!
WARNING: We all have more thread than we think we do so allow yourself to go as big as you can - I wish I would have made mine the entire length of my wall!!
If you don't have an option to make yourself here are some great alternatives!
These also work as a bonus to TREAT YO' SELF to some new thread when you do make your own new rack!!
Check out the rest of our sewing room tutorials HERE!


 , sharpies, or even puff paint to make your bag your own. I cannot describe how much the kids had decorating these. We go on an annual trip each year with extended family so each grandchild decorated one to take along.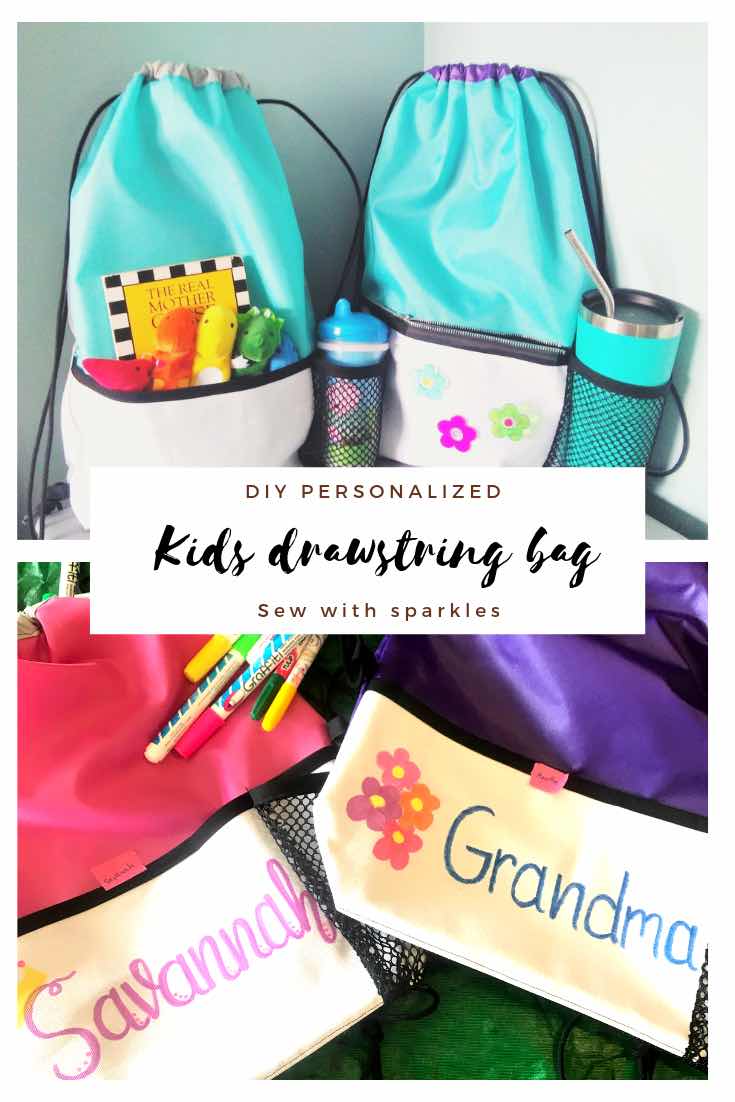


 My mom had used Spoonflower recently (see the llama print on back - yes minky picture of the front!!!) and had great results so I thought maybe I could as well. I scanned in recipes from mom, mother in law, grandmothers, dad, and friends and made a collage photo that I uploaded to Spoonflower.